

If you’re like me then the word Pinterest caught your attention. You can’t go anywhere these days without someone mentioning something they saw on Pinterest may it be garbage disposal cleaning tablets, the latest in nail polish trends or how to make zucchini brownies. Wine Tasting Bliss is no different because I am obsessed with Pinterest (full disclosure: I’ve recently bit the bullet to actually try things I’ve pinned) and I want to share with you what I surprisingly found to be a simple DIY project which turned out fabulous!
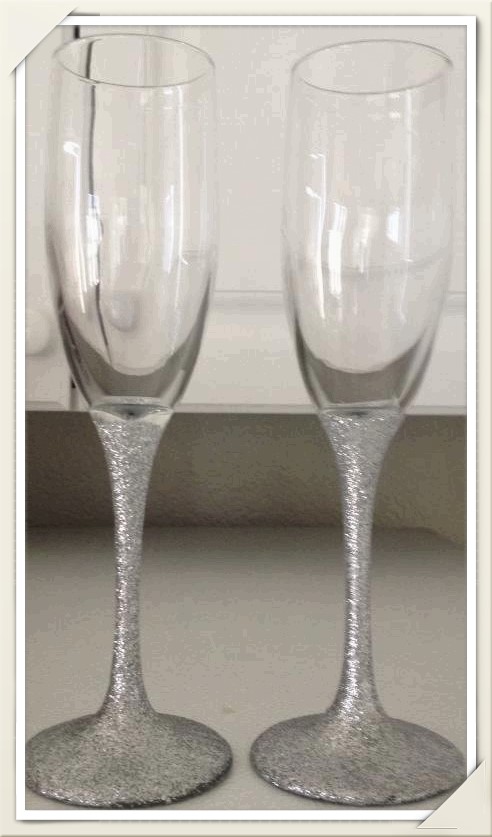
DIY — How to make your own Glittered Champagne Flutes
I selected champagne flutes to celebrate my friend’s recent engagement, but of course you can use this same technique on wine glasses or any other type of glass or vase for that matter.
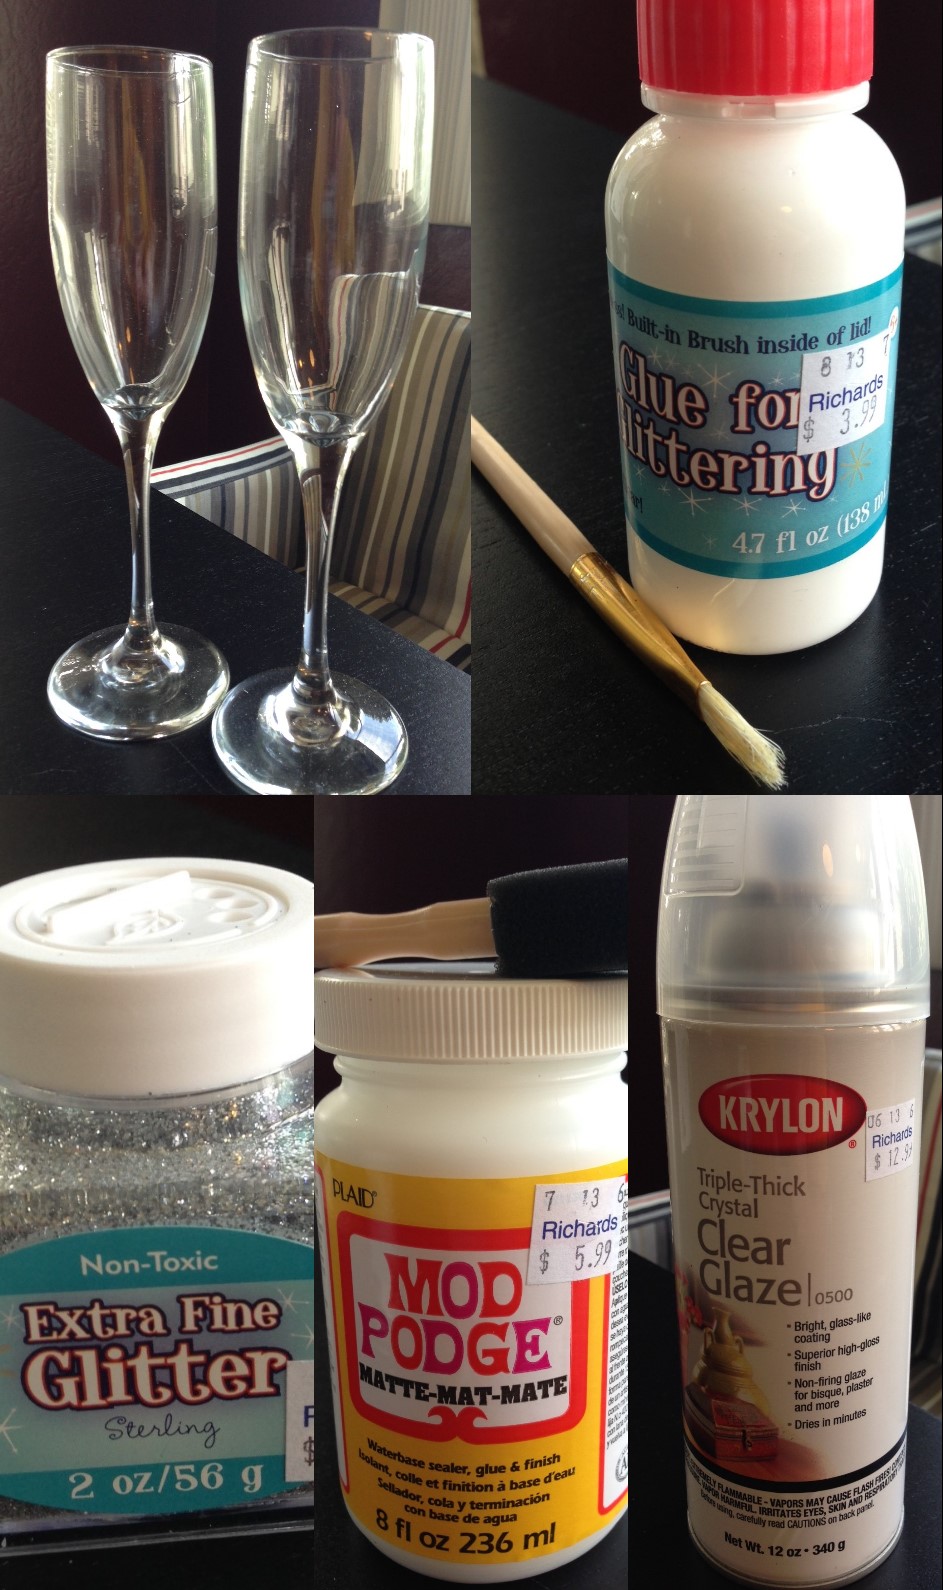
Supplies:
1. Champagne Flutes: I purchased a set of four at Walmart for $5
2. Glue: Since I was picking up glitter at Richards Crafts this glue was right next to it and I thought it was nifty with the built-in brush for $3.99. I was wrong about the brush though. I ended up using a paint brush because it was too messy and the brush was too thick.
3. Glitter: Extra fine glitter. You don’t want to get the big chunky stuff (for this project) that you used back in elementary school. This 2 oz. jar of Extra Fine Glitter from Richards Crafts was $3.99.
4. Mod Podge: I went with the classic matte Mod Podge. Again purchased at Richards Crafts for $5.99 (used a 50% off coupon).
5. Clear Glaze: $12.99 (40% off) at Richards.
Step 1:
Lay out newspaper or a paper bag on your table. Otherwise you will have glitter for days all over your house and for some reason husbands don’t enjoy that as much as you would think. Now determine which part you would like to decorate. I selected the base and stem.
Step 2:
Apply glue to area.
Step 3:
Sprinkle glitter (over a paper plate to catch excess).
Step 4:
Set to dry. Some posts say 30 minutes, I let mine dry for a couple of hours because I got distracted doing other things around the house.
Step 5:
Apply Mod Podge with sponge brush. If this is your first time using Mod Podge don’t panic if the glitter is now covered in white, I promise it dries clear. Let this dry. I let mine dry overnight to make sure everything was set plus it was late.
Step 6:
Cover the area you do not want to spray the Clear Glaze on and spray the glittered area. I highly recommend spraying outside and letting it dry in a well ventilated room. Let dry.
About the Author: Sarah's philosophy is that every occasion; a wedding, job promotion, Friday night after a tough week or even sitting at a Pai Gow table in Las Vegas should be celebrated with a glass of bubbly in hand. Her reviews will be casual, just like her. Descriptions will be basic and typically consist of a great place to drink said wine.
